I had a dear friend of mine send me fabric and some of her husband's ACU military uniforms to transform into a diaper baby for her upcoming baby girl. It was quite a project but it was FUN! I enjoyed ripping apart the uniform WAY TOO MUCH! :-)
Now that Julie has finally received her gift I can blog about it!
After a full day of sewing this is how my bed looked...meaning I would have to finish the project if I wanted any sleep!
Action shot of me sewing the bag together.
Another action shot, thanks to timers. Deep in concentration.
FINISHED! The supports in the side helping it stand up didn't end up staying, that's a project I need to work on for later is figuring that out. It still needed to be "dolled up" a little. The two front pockets were camouflaged into the rest of the bag...you didn't even know there were pockets there did you?
Here's the inside. There is an inside pocket on the back side. I used a magnet closure which was fun to do, but a little pricey.
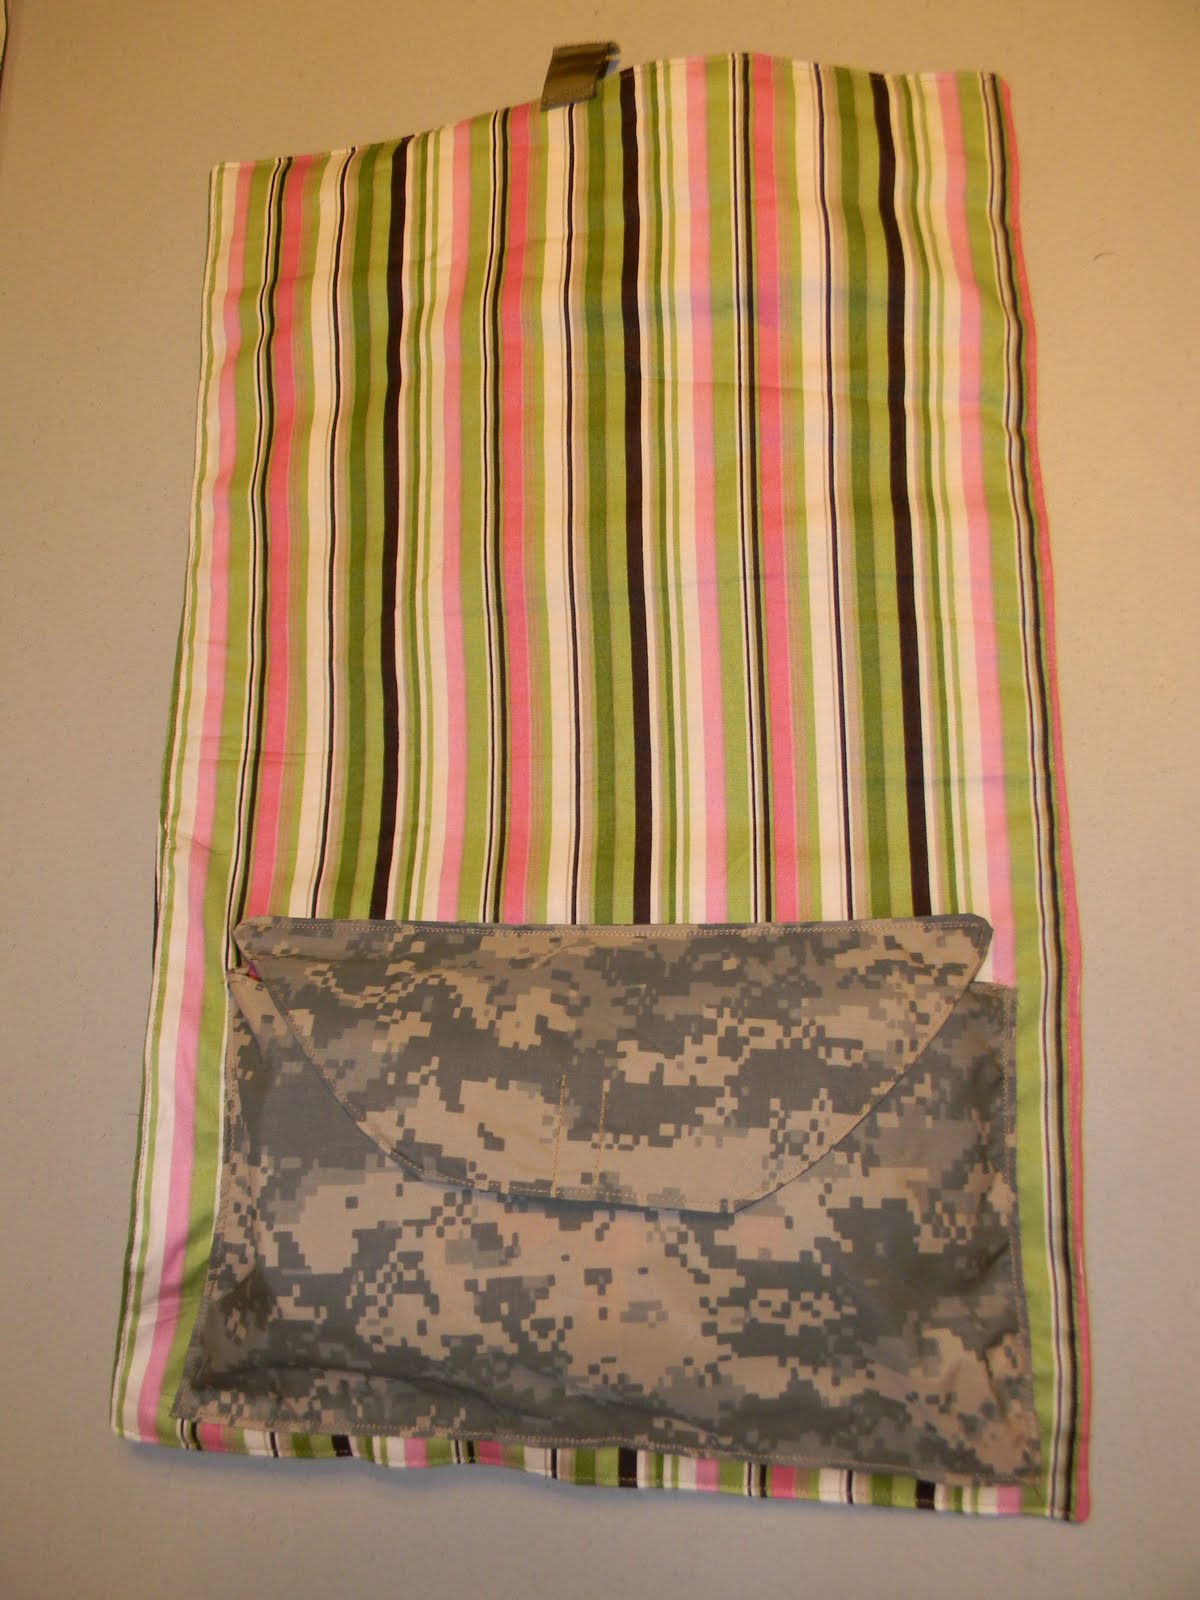
Diaper changing pad (rolled up). There was a pocket on the outside but I removed that the night before I mailed it...would be nice to have a pocket for diaper cream, etc, but the placement would be right in the baby's back....need to think that one through a little more.
Unrolled changing pad, WITH diaper carry case in it. Currently holding 2 diapers and a wipe container (for the picture).
Close up of final embellishments. It's amazing how those little dragon flies and the bows really make the front pockets POP out!
The FINAL product! I was really happy with how it turned out. These go online for hundreds of dollars. This one was made with love for a GREAT friend! It's got 2 side pockets for bottles, 2 front pockets (with Velcro for "Army Wife" and "Lastname" name tags to stick), 1 inside pocket, and 1 literally hidden pocket on the very back side.
LOVED making it! If you're interested in someone this elaborate you'll need to see how much I love you first :-)
HAPPY few months before baby-time Julie!
P.S. I am going to be making burp cloths to finish the set...just haven't gotten that far yet and was impatient for Julie to see the bag! Stay tuned.